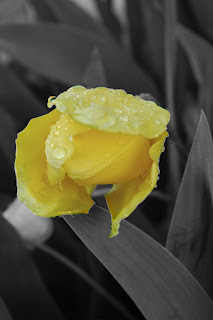
Here is my original image, fresh from sleeping in my camera. You first need to pick your image. This one is pretty good in full color, except for that rascally little bud right under the cute one. He isn't so cute, or in focus, for that matter.
Open your image in your photo editing software. My preference is PhotoShop Elements (PSE). It is less expensive than the full version of Photoshop AND if you download it from the HP website, you get a free 30 day trial AND a discount! Score!! Enhance your image to your little heart's desire. On this one, I did nothing. I just kind of like the raw (not RAW) image that I took.

After you have edited, you may want to turn up the saturation level on your photo. Look at the part of the image you want to be in color when all is said and done and see if it is vibrant enough for you. You may decide to turn it down, too.
After all your tweaking is complete, you need to make a duplicate of your image. My photo was number 13, so the duplicate's name was 13 copy. In PSE, in the image drop-down menu, there is a selection titled mode. This is where you want to go. There are many selection referring to color. Choose greyscale. Poof...you now have two identical images, one in full color and one in greyscale.
Now comes the trickiest part of this whole transformation. Drag your greyscale image onto your color image, making a stack. In PSE, they will sort of automatically "snap to grid", meaning they will pretty much line up on their own. Again, you may have to tweak this a bit.
Now for the fun. Find your eraser tool. In PSE, it looks like a pink eraser. Click it. On top of the image screen, you will have the option of choosing which brush to use, thickness, opacity and a couple other toys. Put your mouse on your photo and erase away.

I really love this new fun application I learned and hopefully you will find it fun and easy to do!! If you have any questions, let me know. You can link to your fun images so I can see what you have done, too. I love that!!

 I have been taking a class on-line through my local Community College, well, three actually, but the one I am really loving is Digital Photography. I love learning all the fun things I can do with my photoshop software - which I really recommend for all of your photo needs. This last week I learned how to add color back to a black and white image. It really does sound daunting, but it is surprisingly simple and REALLY fun to do!


